Dual booting Ubuntu and Windows is not that complicated and I have covered it in detailed tutorial in the past. Recently, I also wrote about dual booting on a Bitlocker encrypted Windows system.
And yet here I am talking about it again. Why? Because the scenario is slightly different and several It’s FOSS readers have asked questions about this particular scenario.
Here’s the scenario: you got a new computer. It comes with a SSD with limited disk space like 120 GB and an additional HDD with 500 GB or 1 TB disk space. This is usually the scene with gaming laptops where large disk space matters for storing game files but SSD is required for faster boot and computing experience. 1 TB SSD would increase the system price a lot and hence this particular combination of SSD and HDD.
Now, if you want to dual boot on a system with two disks, you may get confused about where should you be installing Linux.
You have three options:
- Install Linux completely on the SSD. You’ll get full advantage of SSD speed, but then you will have only a limited disk space.
- Install Linux completely on the HDD. You’ll have plenty of disk space, but Linux will boot slower, and you won’t get the SSD advantage.
- A compromise between SSD and HDD. You keep the root (and thus swap and boot) on SSD and you put your Home directory on HDD. This way, you boot faster into Linux and you have plenty of disk space for your personal documents and downloads.
There is also a fourth option here. You keep root as well as home on SSD. And you make a partition on the HDD and then soft link it to your Music, Videos and Downloads folder. This way, application-specific files like browser caching utilize the SSD and other big files stay on HDD. But this could be complicated to set specially with fast boot enabled on Windows which would mean special efforts to auto-mount the partitions.
I recommend going with the third option for dual booting on separate hard drives and this is what I am going to show you in this tutorial.
Dual boot Ubuntu and Windows on a system with SSD and HDD

I have used an Acer Predator gaming laptop in this tutorial to install Ubuntu alongside Windows. The tutorial should work for other hardware manufacturers and Linux distributions.
I advise reading through all the steps first and then follow the tutorial on your system.
Prerequisite
Here are the things you need in this tutorial:
- A computer that comes preinstalled with Windows 10 and has both an SSD and an HDD.
- A USB key (pen drive or USB drive) of at least 4 GB in size and no data on it.
- Internet connection (for downloading Ubuntu ISO image and live USB creating tool).
- Optional: External USB disk for making back up of your data.
- Optional: Windows recovery disk (if you encounter any major boot issues, it could be fixed).
Step 1: Make backup of your data
Since you’ll be dealing with disk partitions, it will be wise to make a copy of your important files on an external disk. This is optional but having a backup is always a good idea.
You can use an external HDD (slower but cheaper) or SSD (faster but expensive) and copy the important files and folders on it.
Step 2: Make disk partition for Ubuntu installation
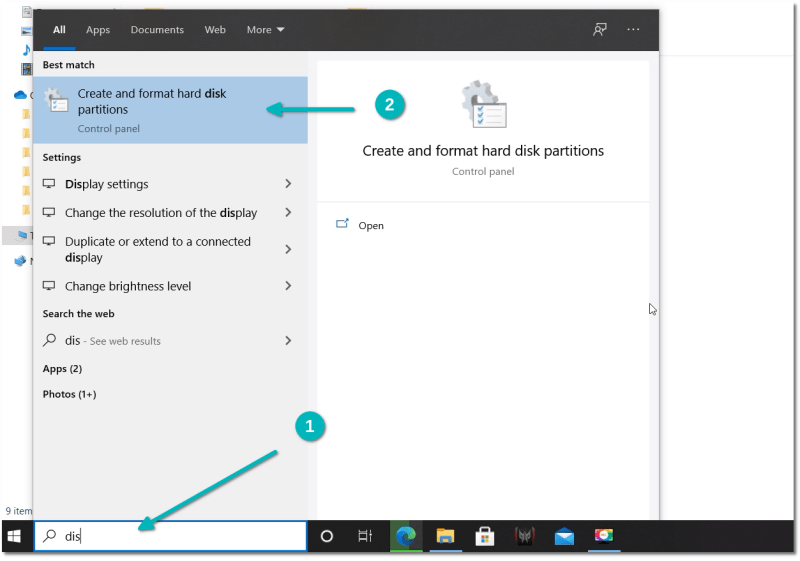
In the Windows menu, search for disk and go to ‘Create and format hard disk partitions’.

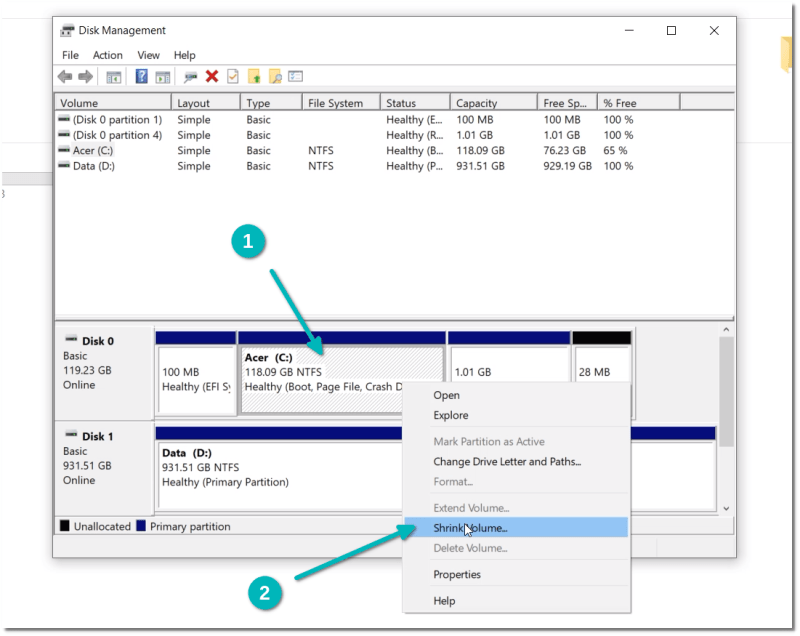
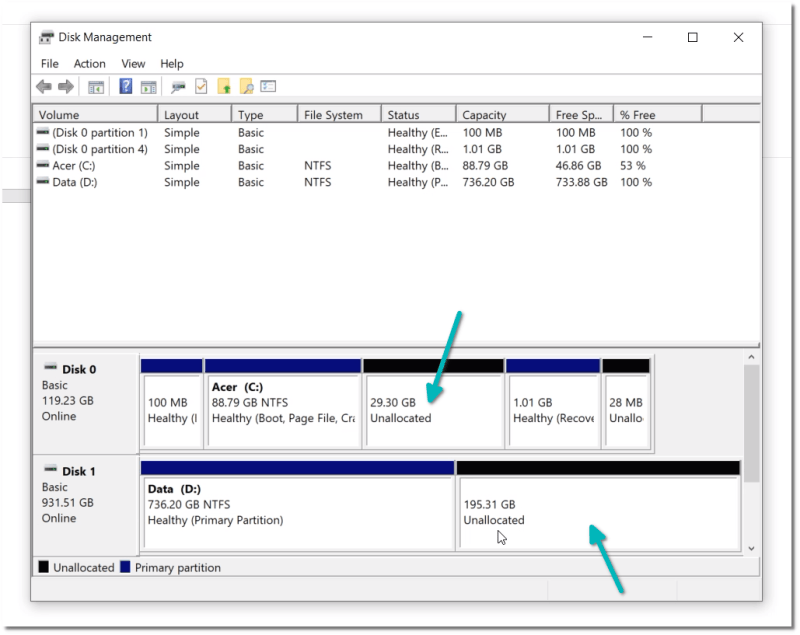
You’ll see both SSD and HDD here. You have to shrink both SSD and HDD one by one and make some free space that will be utilized later for installing Ubuntu Linux.
Right click on the SSD and choose Shrink Volume option.

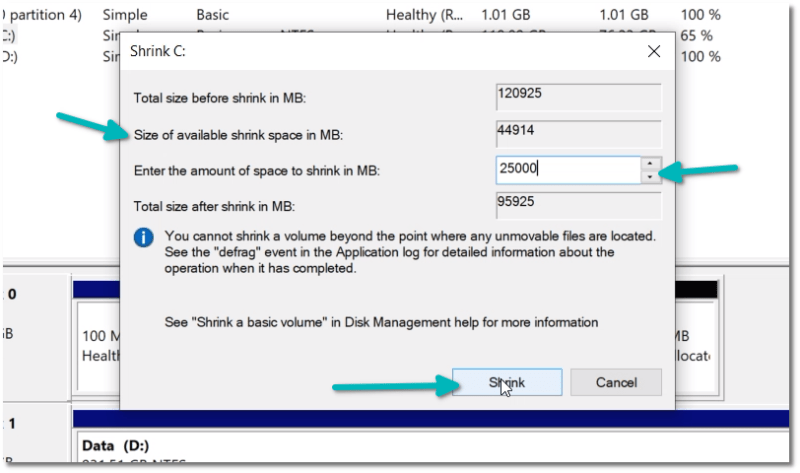
It will give you the largest possible disk partition you can make here. Don’t use it all. Leave some extra space for Windows. I have given it 30 GB which is a decent disk space for the root partition. Anything between 20 and 40 GB is a fair choice.

Repeat the process with the HDD as well. I made around 200 GB of free space for Linux. You are free to decide how much space you want to allocate to Ubuntu.
Here’s what the final disk scenario looks like for my system. 29.3 GB free space on SSD and 195.3 GB free space on HDD.

Step 3: Download Ubuntu
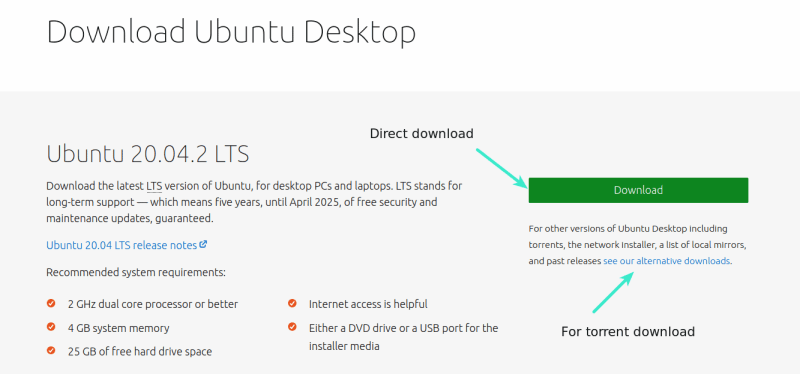

Go to Ubuntu’s website and download the ISO file. If you need torrents, you can find it under the ‘alternative downloads’.
Step 4: Create bootable Ubuntu USB
You can easily create bootable Ubuntu USB in Windows, Linux and macOS. Since the focus here is on Windows, you can use a Windows specific tool like Rufus. Etcher is also a good tool in this regard.
Download Rufus from its website.
Plug in your USB. Make sure it doesn’t have any important data because it will be formatted.
Run the Rufus tool. It automatically identifies the plugged in USB but double check it anyway. Then browse to the location of the downloaded ISO image and ensure that it uses GPT partitioning scheme and UEFI target system.
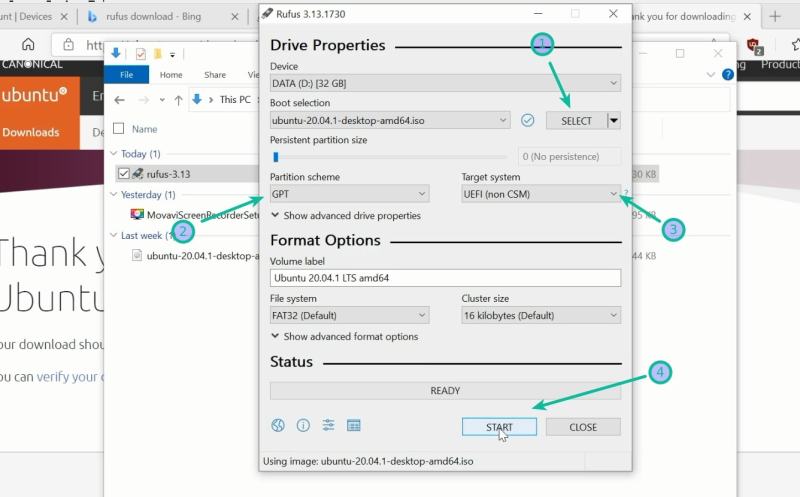

Hit the start button and wait for the process to complete. Once you have the live Ubuntu USB ready, the next step is to boot from it.
Step 5: Boot from the live USB
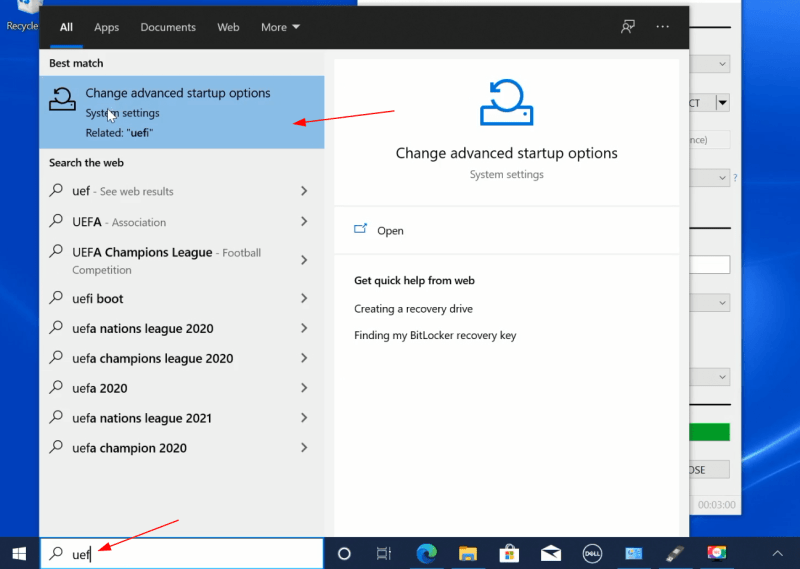
You may choose to access the boot settings when the system starts by pressing F2/F10/F12 button but a more robust way is go through Windows.
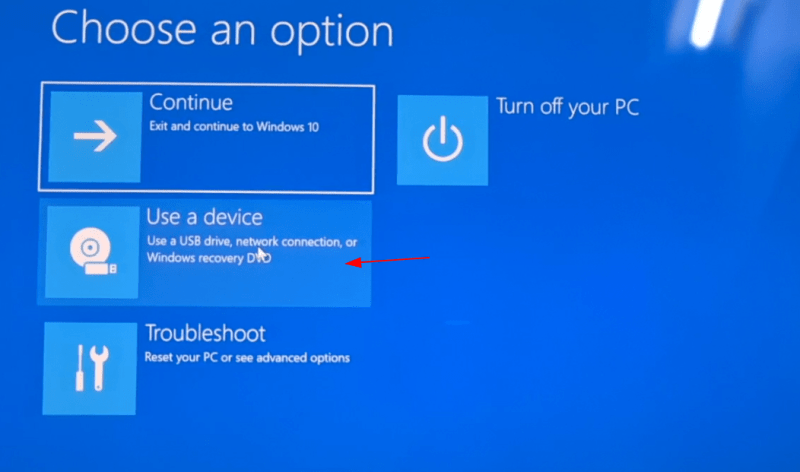
In the Windows menu, search for UEFI and then click on ‘Change advanced startup options’:

Under the Advanced startup option, click on Restart now button.


On the next screen, click on ‘Use a device’:

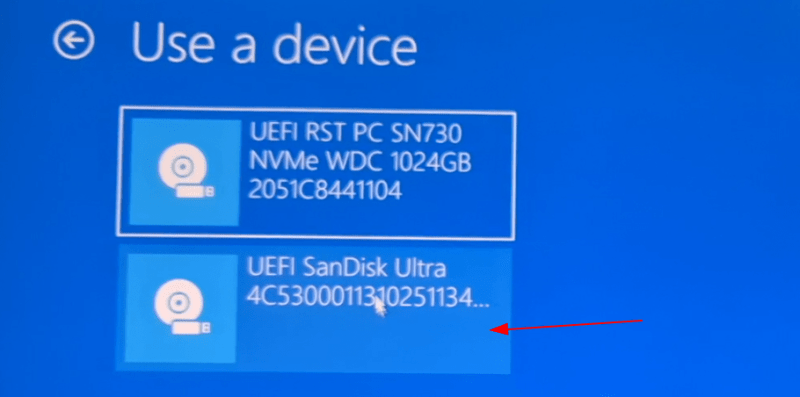
Recognize the USB disk with its name and size. It may also be displayed as EFI USB Device.

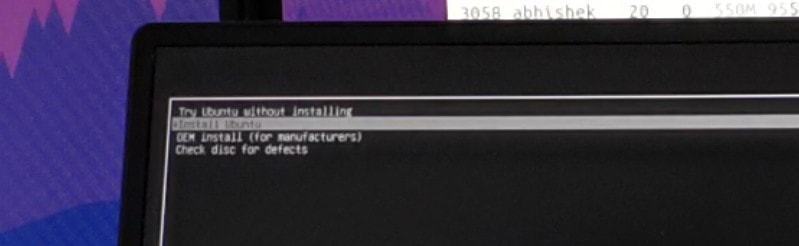
Now it will power off your system and reboot into the disk you chose which should be the live USB disk. You should see a screen like this:

Step 6: Installing Ubuntu Linux
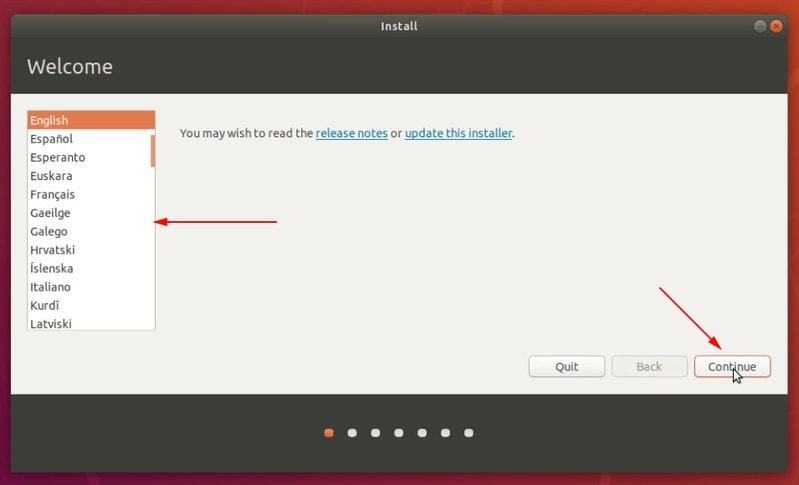
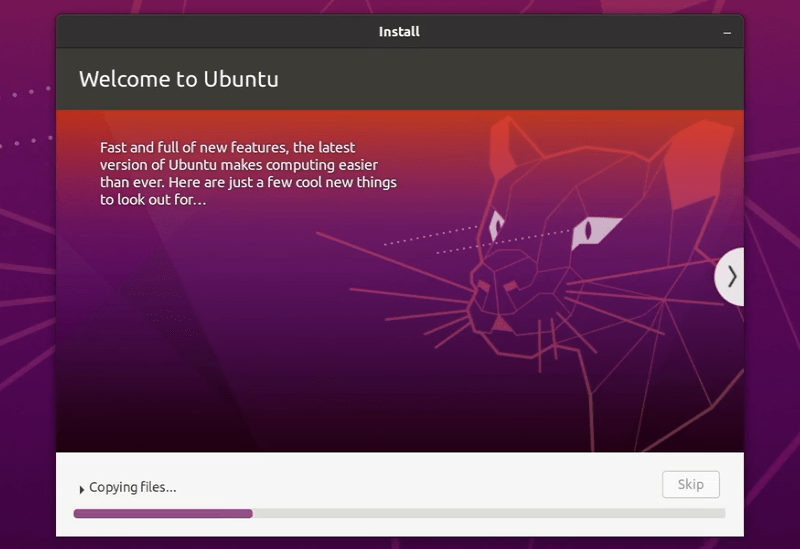
Now that you have booted from the live USB, you may start the installation procedure. The first few steps are simple. You choose the language and keyboard.
-

Choose your language -
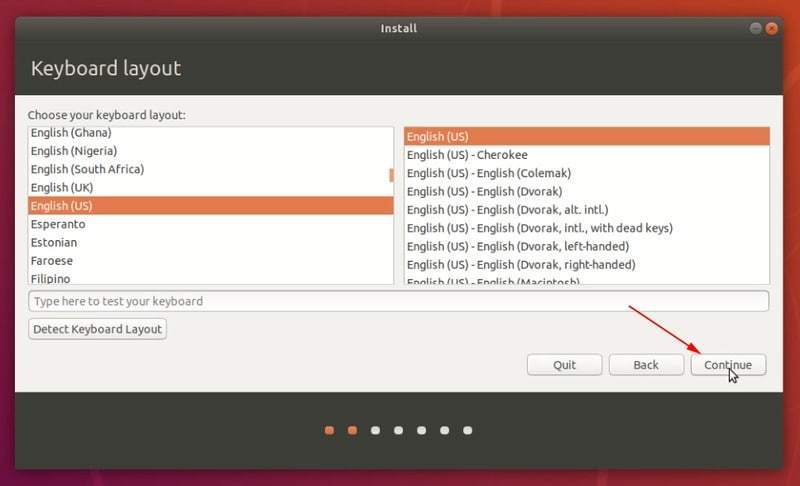

Choose keyboard layout


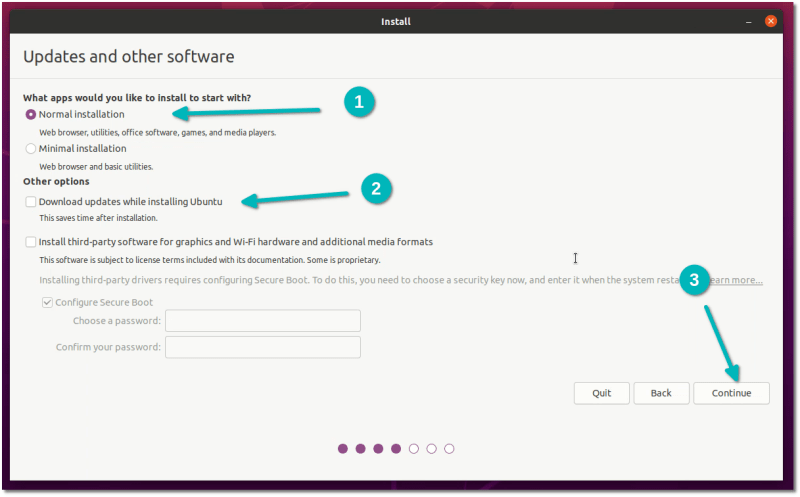
On the next screen, choose Normal installation. No need to download updates or install third-party software just yet. You may do it after installation completes.

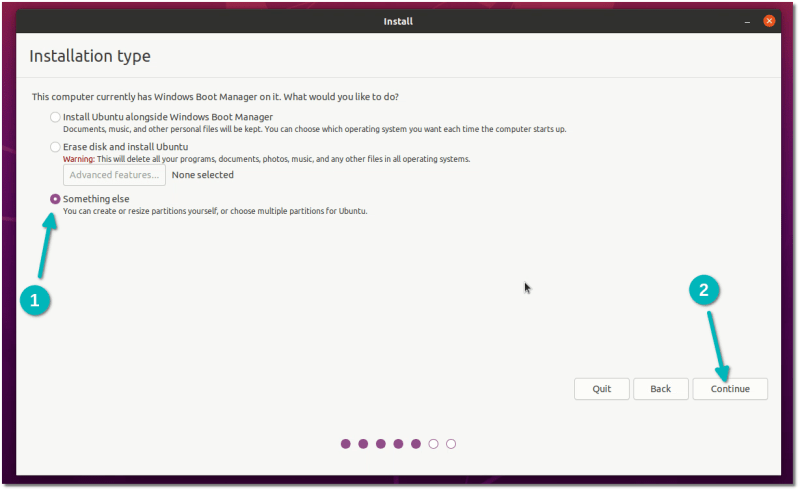
After some time you’ll see the Installation type screen. Here, opt for ‘Something else‘ option:

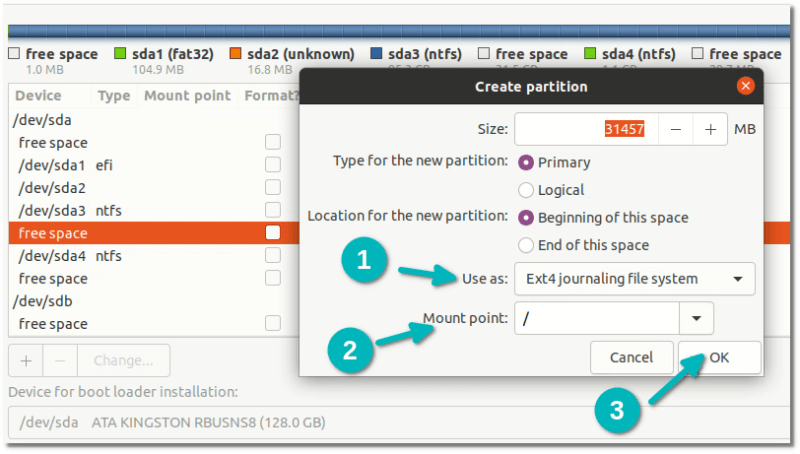
You should see the free space you had created earlier on the next screen. Select the free space created on SSD (you can guess by its size if nothing else) and click on the + sign to use this free space.


By default, it will take the entire free space which is a good thing. Keep the partition type primary.
What you need to change is the file system type to Ext4 and mount point to / (/ means root in Linux).

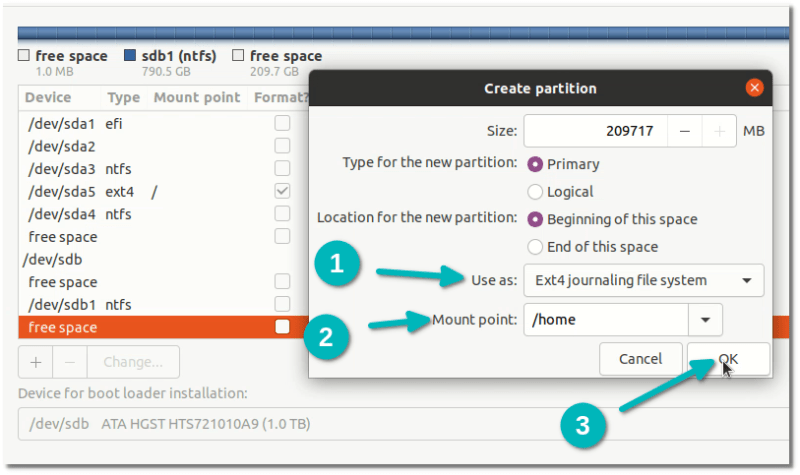
Now, select the other free space on the HDD and click the + sign.
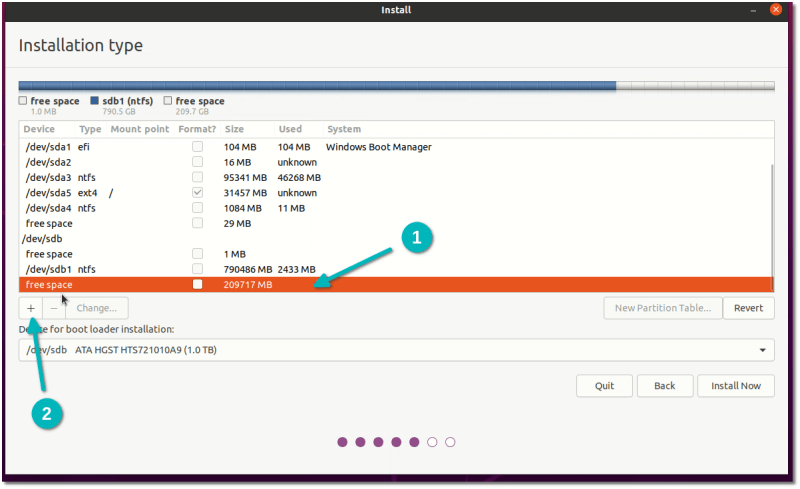

This time choose Home as the mount point. Partition remains primary and file type ext4.

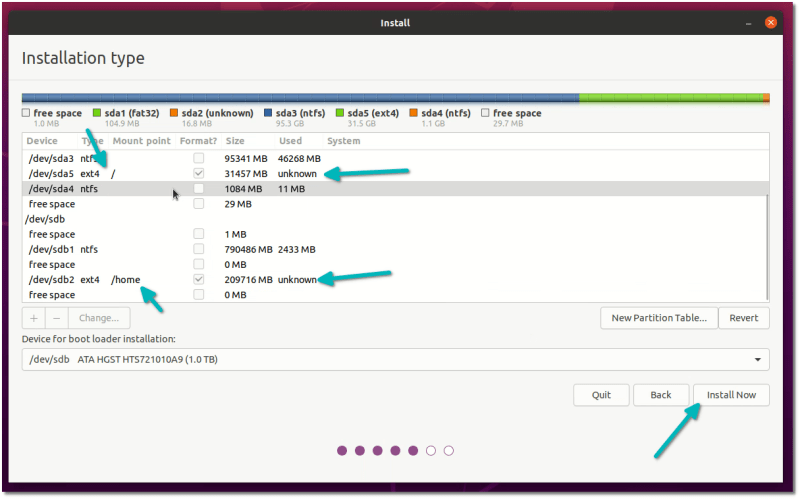
You don’t need to worry about ‘Device for boot loader installation’. You have a pre-installed Windows UEFI system. You should have an EFI partitioning (ESP) already (for me it’s 100 MB partitioning with type efi). The Ubuntu installer is intelligent and can automatically detect this partition and use it for Grub bootloader.
This is the final partitioning scheme for my system. If everything looks good, hit the Install Now button.

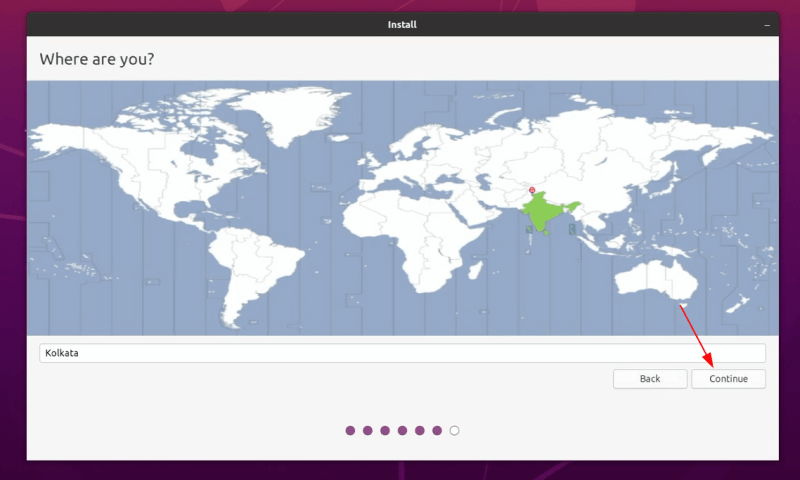
Things are pretty straightforward from here. Select a timezone.

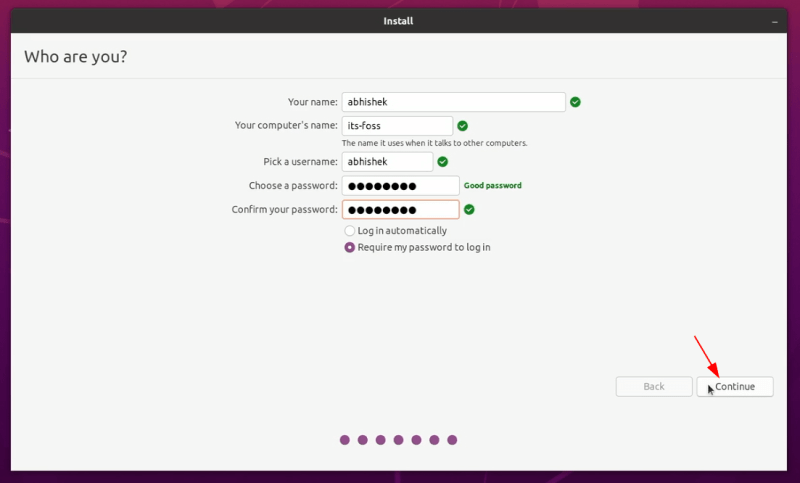
Enter a username, computer’s name, i.e. hostname and an easy to remember password.

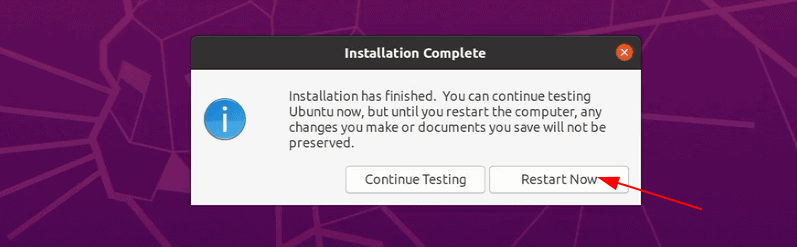
Now wait for like 7-8 minutes for the installation to finish.

Restart the system when the installation finishes.

You’ll be asked to remove the USB disk. Remove the disk and press enter.


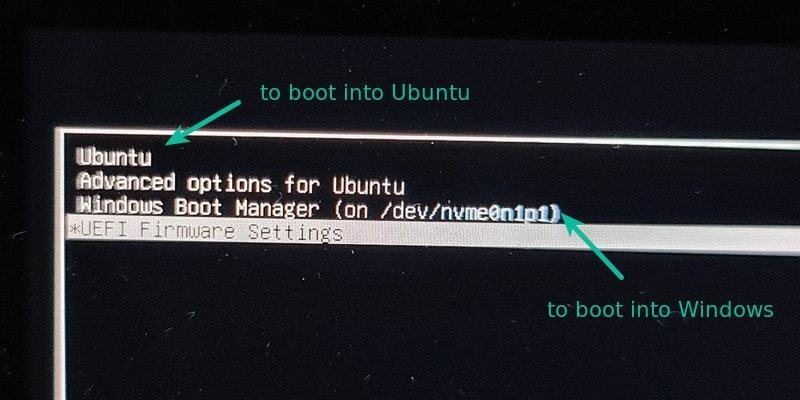
If things go right, you should see the black or purple grub screen with option to boot into Ubuntu and Windows.

That’s it. You can now enjoy both Windows and Linux on the same system with SSD and HDD. Nice, isn’t it?
I hope this tutorial was helpful to you. If you still have questions or facing any issues, let me know in the comment section, and I’ll try to help you out.