When you plug in a USB, your host OS can easily access it and use the files on it. That’s not a surprise.
If you are using virtual machines with Virtual Box on Linux, you can put some effort and access the USB plugged in to your physical machine from the VM.
Let me walk you through step-by-step how you can access a USB disk in VirtualBox VM.
How to access a USB drive in VirtualBox VM
By default, you can not use VirtualBox to access the USB drive as you have to install the extension pack manager and additionally, a little configuration part is also there.
This is the reason why I’ve divided this tutorial into three easy steps. So let’s start with the first one.
Step 1: Install the VirtualBox extension pack (on host)
This is the most important step of this tutorial as you are about to install an extension of VirtualBox which will enable you to use a USB drive in a VM.
🚧
You should install the same version extension pack as your installed version of VirtualBox.
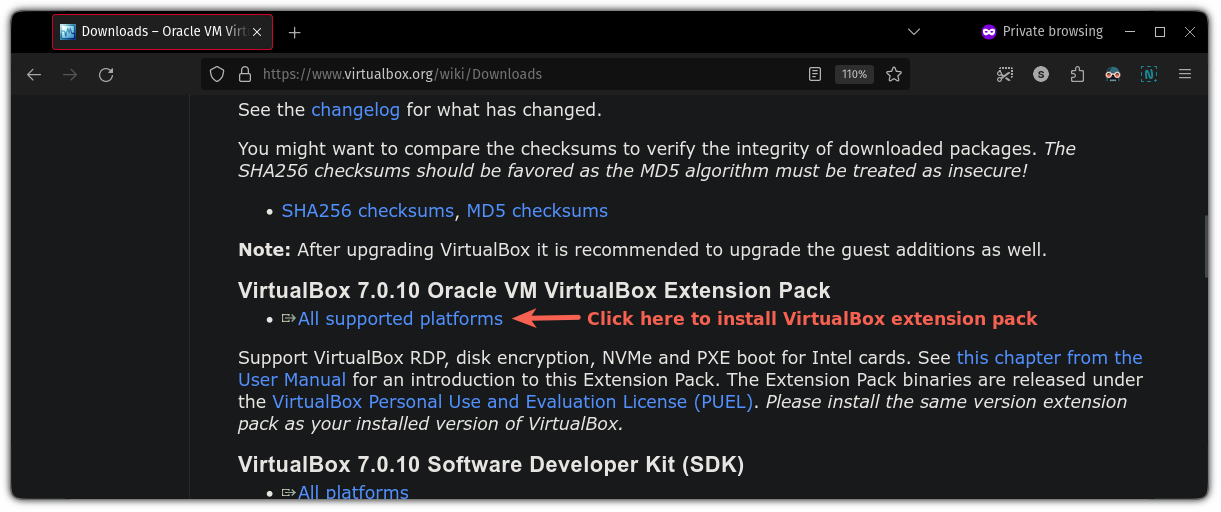
To install the VirtualBox extension pack, simply visit the official download page of VirtualBox, scroll down a bit and there you will find an option to download the extension pack:
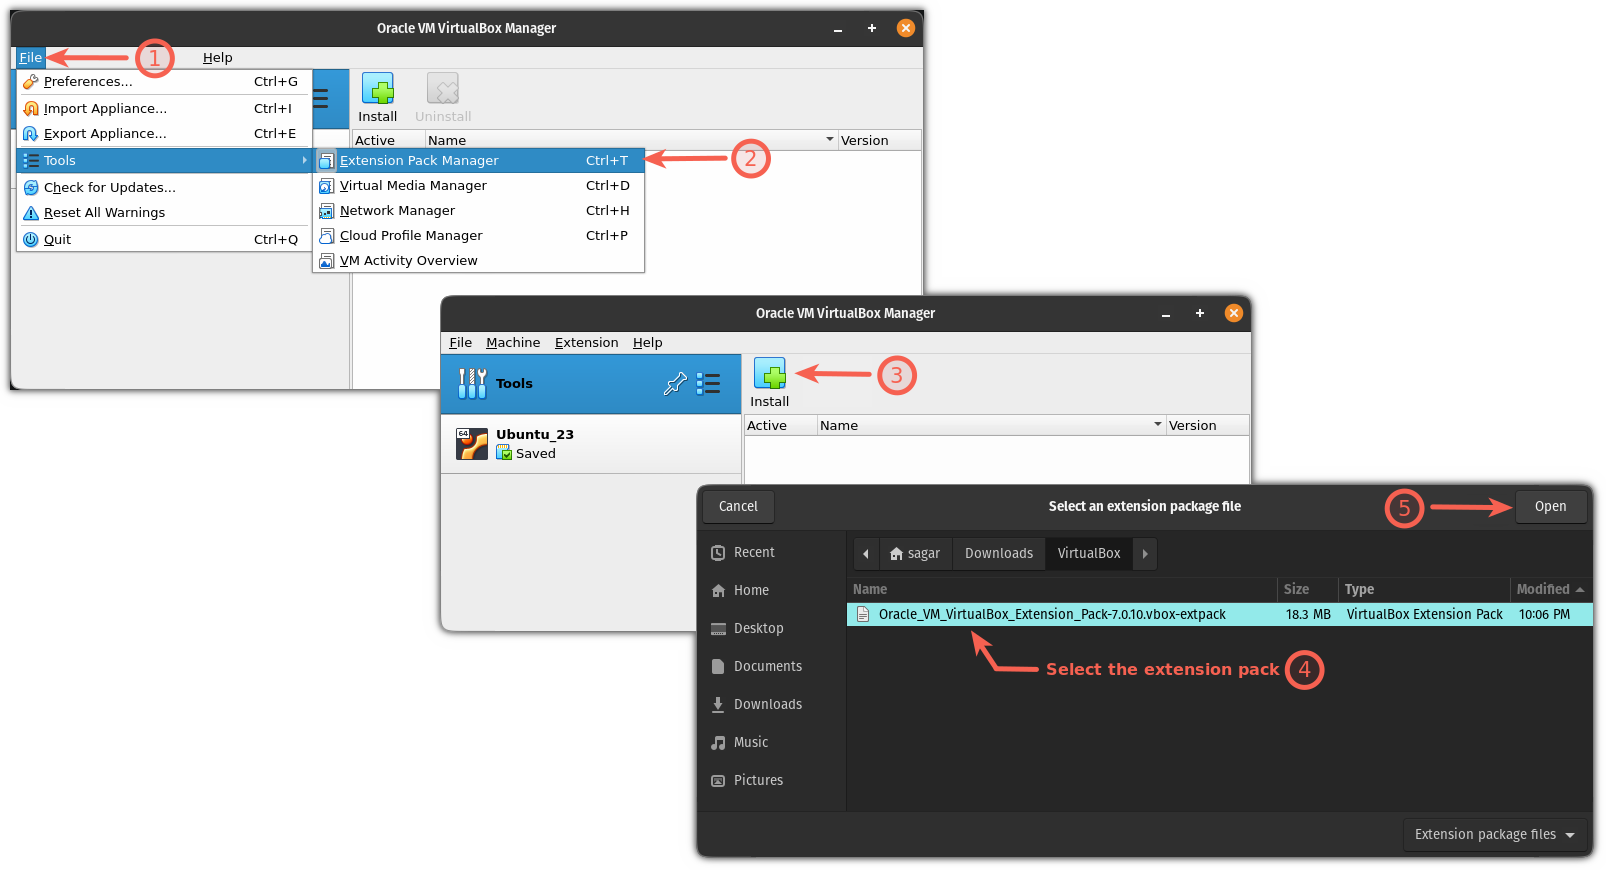
Once you are done downloading the extension pack follow 3 simple steps:
- Go to
File>Tools>Extension Pack Manager - Hit the
Installbutton - Select the downloaded file from the file manager:
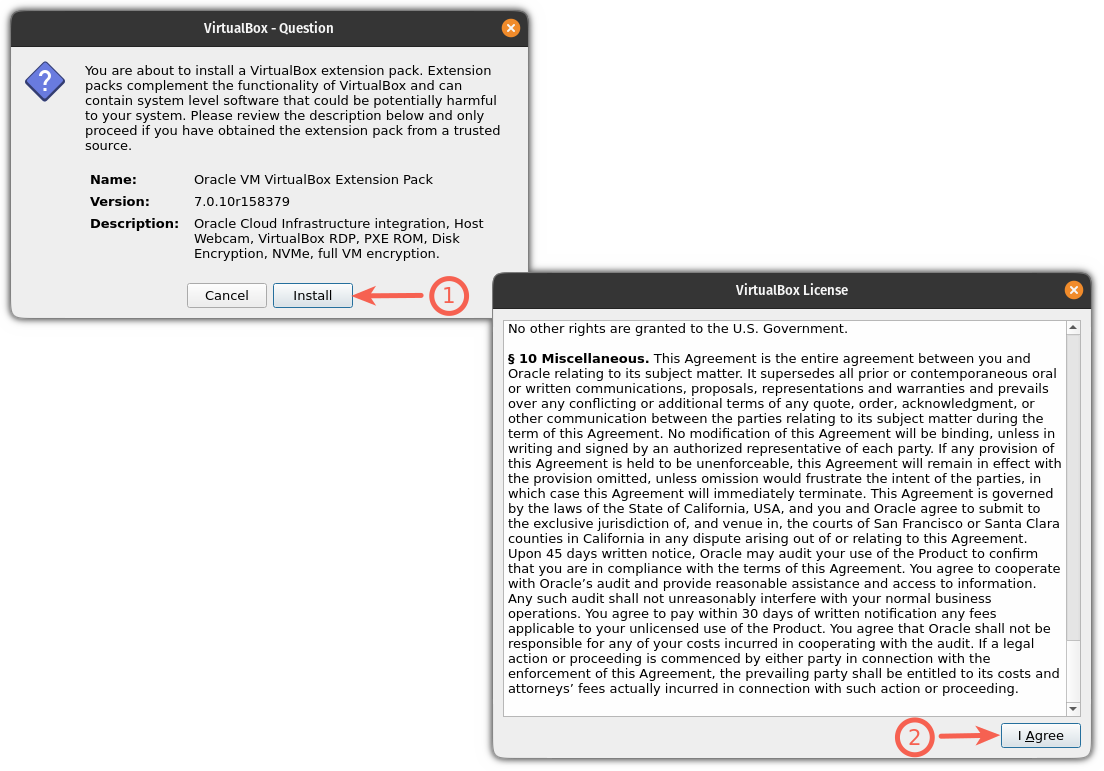
It will open a new prompt to install the extension pack where all you have to do is hit the Install button and accept the terms and conditions:
And we are done with the installation of the extension pack.
Step 2: Add the user to the vboxusers group (on host)
To use a USB drive in VirtualBox, your current user needs to be in the vboxusers group.
I know it sounds a little complex but adding a user to the group is one command process and to add your user to `vboxusers group can be done by following:
sudo usermod -aG vboxusers $USEROnce you are done with these two steps, reboot your system to take effect from the steps.
Step 3: Add USB drive to VM
🚧
Before you add a USB for a specific VM, make sure it is powered off (not saved) or you won’t be able to follow the given instructions.
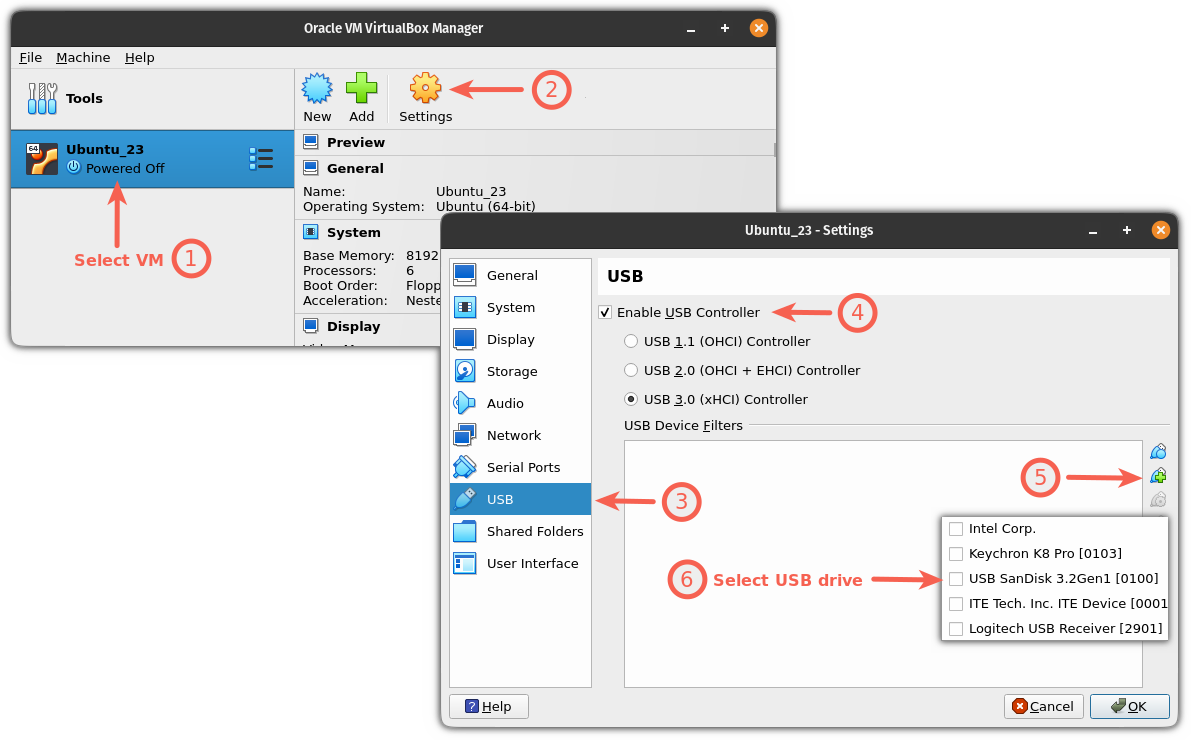
To add USB for VM, you have to follow the given simple steps:
- Select the VM on which you want to use USB and hit
Settings - Go to
USBtab - Check the
Enable USB Controllerbox and select the USB by clicking on+button:
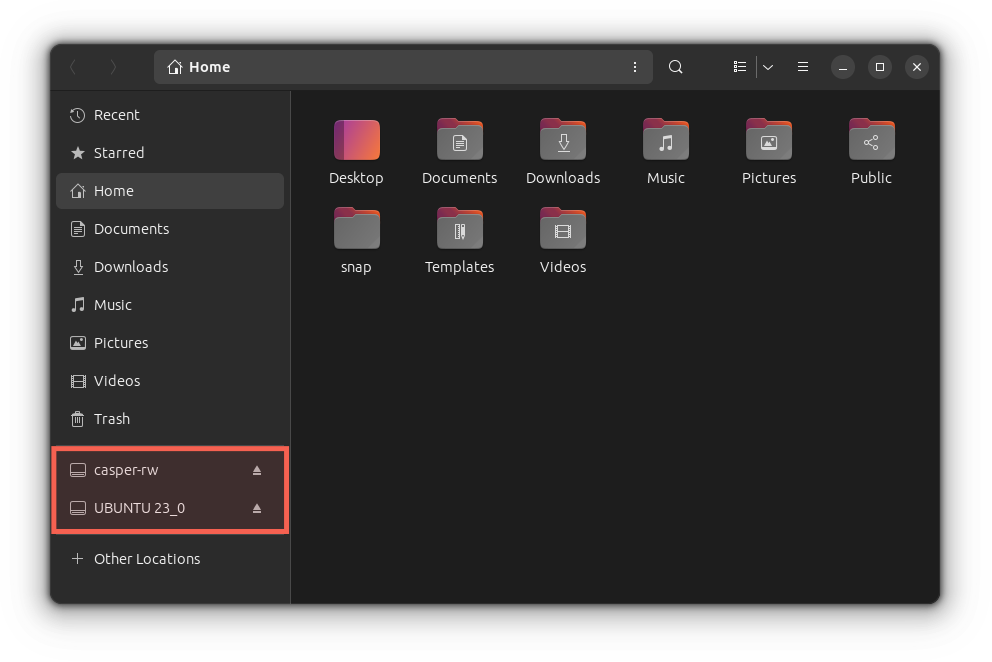
And that’s it! Now you can start your VM and the USB drive should reflect in the file manager. In my case it was Ubuntu, so it looked like this:
More USB and VM trick
If using USB in a VM looks cool to you, booting from it in the VM is even cooler! And here’s a detailed guide on how to boot from a USB drive in VirtualBox:

I hope you will find this guide helpful.

